Video Recording
With Teleprompter Pro on your iPhone or iPad, you can record video using the front-facing camera on your device while reading your script at the same time. Your script will not be visible in the final saved video.
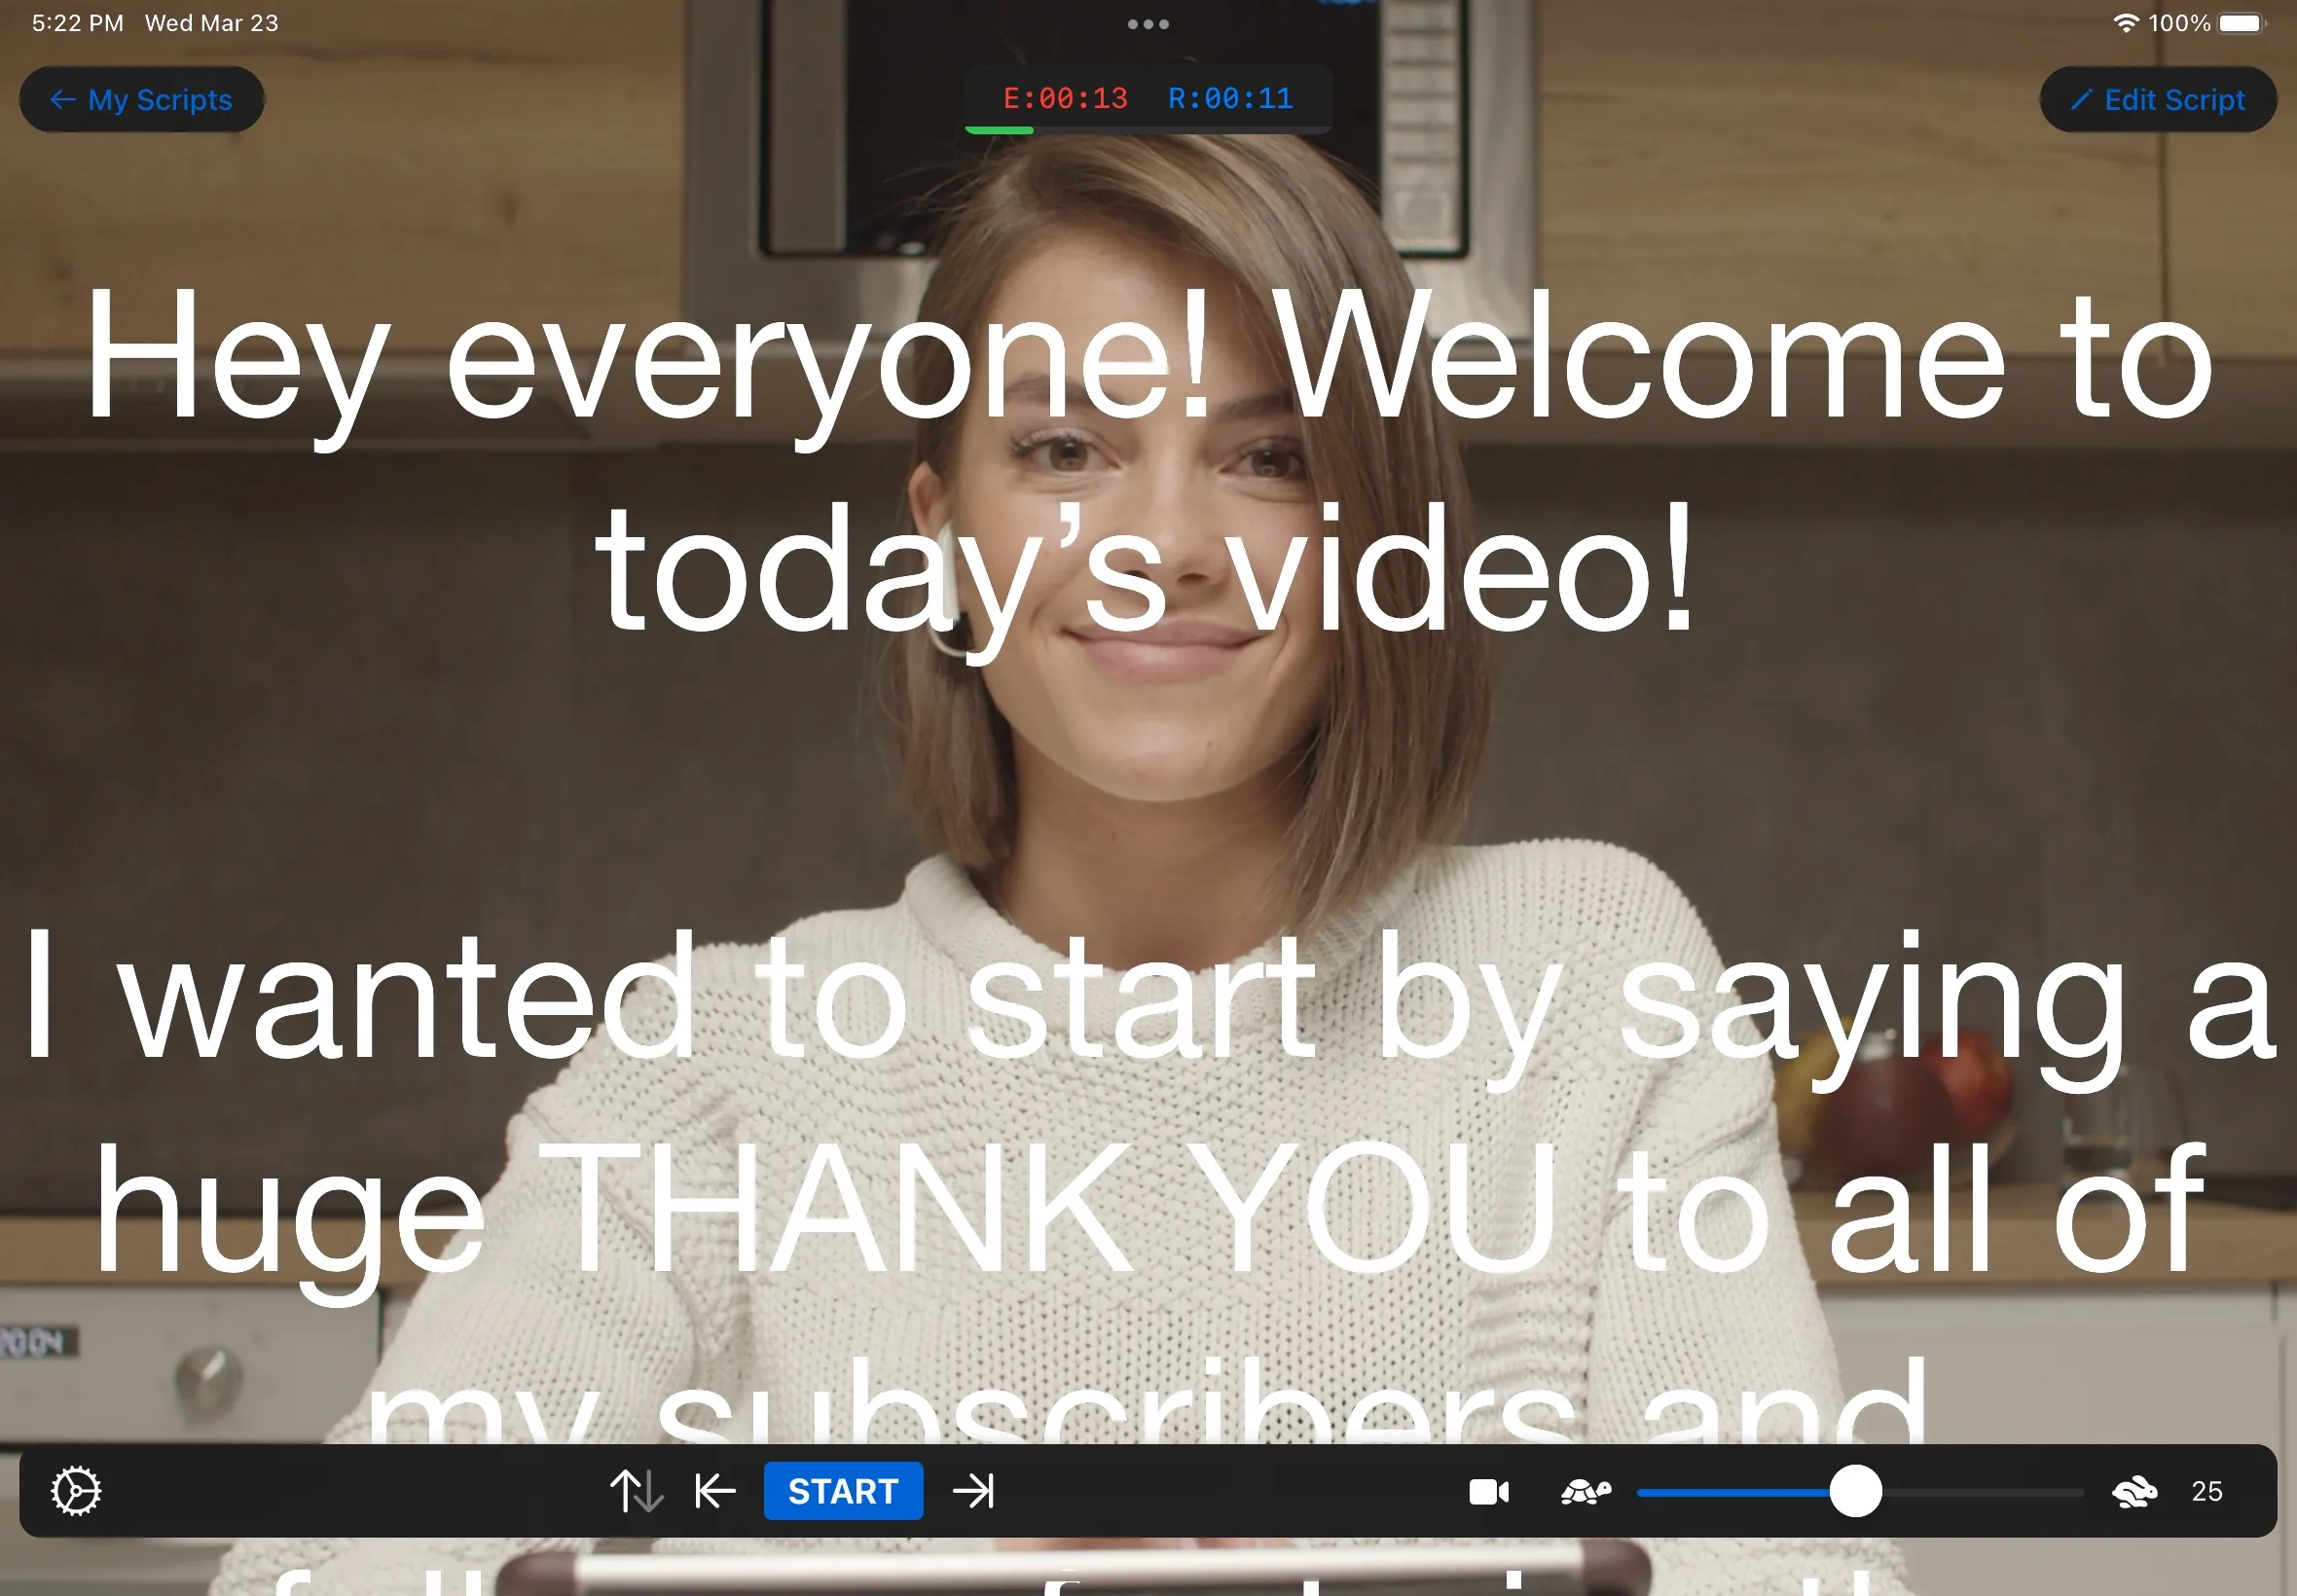
Enable the Camera
To begin recording videos in Teleprompter Pro, enable the camera:
- Open any script in Teleprompter Pro
- Tap
- Tap
Enable Camera - If prompted, allow Teleprompter to access your device camera and microphone. This is required to record your videos.
You will now see your camera appear behind the text in the Teleprompter.
To disable the camera, Tap again, then tap
Enable Camera
Record a video
To record a video:
- Open any script in Teleprompter Pro
- Follow the steps above to enable the camera if it’s not already enabled
- Tap
to begin recording
- Record your video as needed
- Tap
to end recording
While you’re recording, the E: clock will change to yellow and begin counting your elapsed recording time, and the control bar will have a blue outline.
Delete, Save or Share Your Video
After you finish recording, you’re be able to play back your recorded video, and you’ll be given options to Delete, Share or Save to Photos.
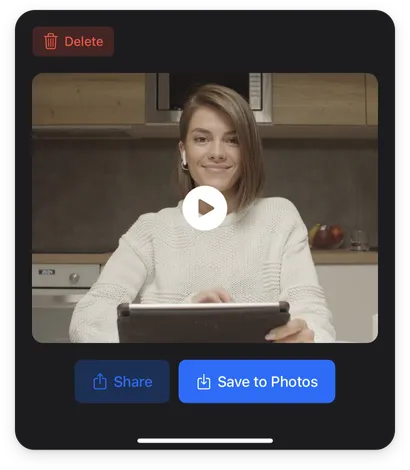
Tap the Delete option to discard your video.
Tap the Save to Photos option to save your video to the Photos library on your device, similar to a normal video recording. You will need to grant Teleprompter privacy access to save to your Photos library.
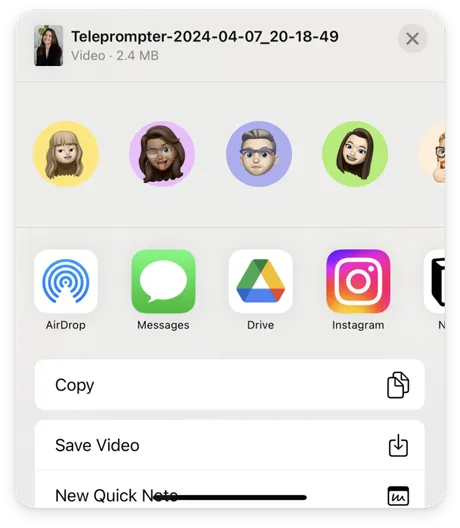
Tap the Share option to share your video to your favourite apps or services.
Video Effects New Update
When recording video in Teleprompter Pro, you can enable some effects to enhance your video. These effects are only supported on certain devices.
Virtual Background
Virtual Background lets you select an alternative background for your video.
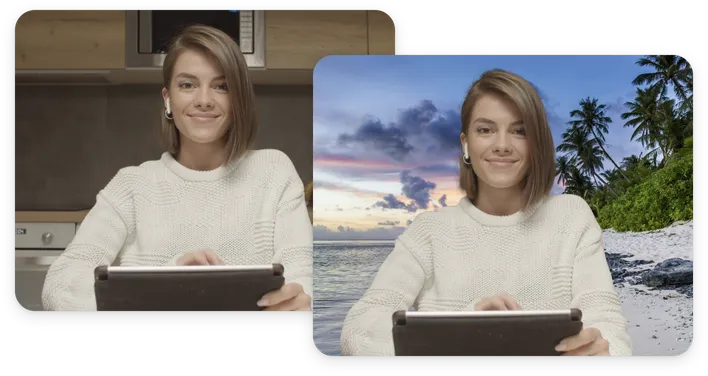
To enable a virtual background:
- Open any script in Teleprompter Pro
- Follow the steps above to enable the camera if it’s not already enabled
- Tap
- Tap
Background - Enable
Virtual Background
You can now select from any of the available virtual backgrounds for your video.
Portrait mode
You can use Portrait mode in Teleprompter Pro, creating a depth-of-field effect. This lets you record your video with a sharp focus on the subject and a blurred background.
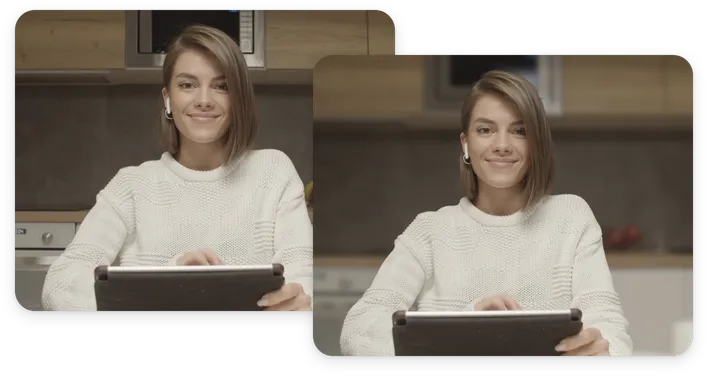
To enable a Portrait mode:
- Open any script in Teleprompter Pro
- Follow the steps above to enable the camera if it’s not already enabled
- Go to Control Center on your device
- Tap
Teleprompterat the top of Control Center
- Select
Portrait - Adjust the Portrait effect as needed.
You can now record videos in portrait mode with a blurred depth-of-field effect in Teleprompter Pro.
Studio Light
You can the Studio Light effect in Teleprompter Pro, which dims the background and illuminates your face.
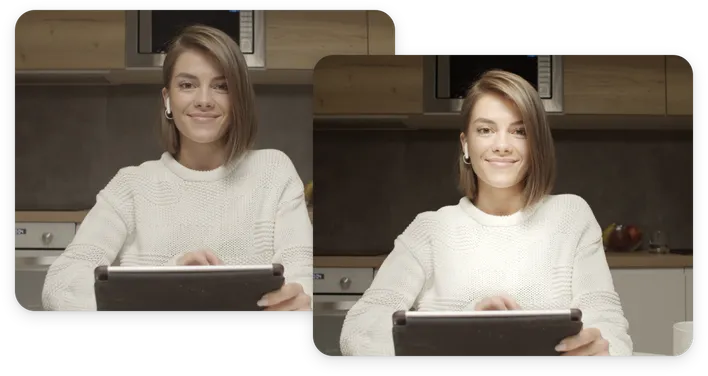
To enable a Portrait mode:
- Open any script in Teleprompter Pro
- Follow the steps above to enable the camera if it’s not already enabled
- Go to Control Center on your device

- Tap
Teleprompterat the top of Control Center
- Select
Studio Light - Adjust the Studio Light effect as needed.
You can now record videos in Teleprompter Pro with the Studio Light effect.
Video Settings
There are various options to adjust how video recording will operate in Teleprompter Pro, such as the camera, resolution, audio and more.
Go to the Video Recording menu:
- Open any script in Teleprompter Pro
- Tap
- Go to
Video Recording
You can also tap and hold on or
to open the Video Recording menu.
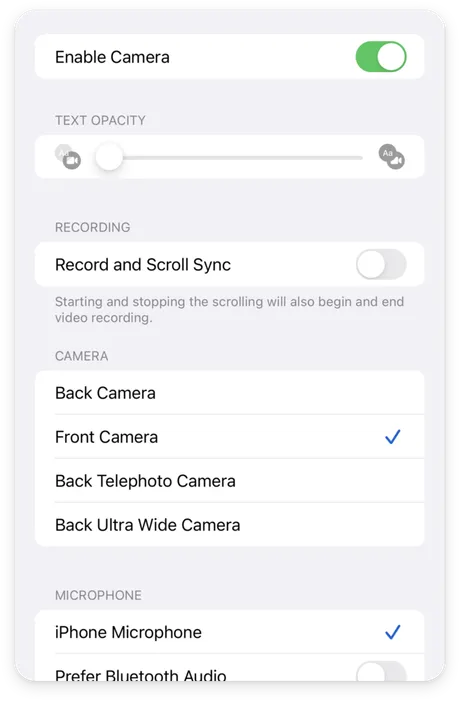
Text Opacity
Adjust the Text Opacity slider to change the transparency of the text background over your camera image. This does not change your recorded video.
Record and Scroll Sync
Enable Record and Scroll Sync to automatically begin recording video when you start scrolling the Teleprompter, and finish recording video when your stop the Teleprompter.
This allows you to begin and end recording with the START button, without having to separately start and end recording.
Camera
Change the Camera option to select which of your device cameras to use, such as the front or rear cameras.
Microphone
Change the Microphone option to select a connected microphone.
Enable Prefer Bluetooth Audio if you have a bluetooth microphone connected, including AirPods.
Video Resolution
Change the Video Resolution option to select which resolution to record your video, including 4K if your selected camera supports it.
On some devices, only the rear camera can record in 4K, check your device specifications for front camera video recording.